Saturday, November 22, 2008

Christmas uses for the Graphically Speaking Cricut Cartridge

I really like the Graphically Speaking cart - almost as much as the Wild Cards cart! Just browsing through it, I came up with a list of cuts we COULD use for Christmas cards, altered art, tags, and LO's. Here's my list - have fun playing!

Christmas Cuts from the Graphically Speaking Cartridge

Bare Tree Imag01-s

Together (word) Image02 using TYPE feature

Heart Image02 using ICON feature (two sizes available)

Gas light Image04 using ICON feature or ICON Blackout feature

Memories (word) Image04 using TYPE feature

Man in the Moon Imag05-s using WORD feature

Moments (word) Image06 using PHRASE feature

Remember (word) Image06 using WORD feature

Bordered frame Imag09-s

Scalloped frame Image 10 using ICON feature or ICON Blackout feature

Heart outlines Image11 using ICON feature or ICON Blackout feature

Stars in an oval Image15 using ICON feature or ICON Blackout feature

Oval bordered frame Imag15-s using ICON feature or ICON Blackout feature

Star outline Imag16-s using ICON feature or ICON Blackout feature

Oval frame Imag21-s

Dotted frame Imag24-s

Open book Imag24-s using ICON feature or ICON Blackout feature

Readers holding book Image24 using ICON feature or ICON Blackout feature

Cup Image28 using ICON feature or ICON Blackout feature

Steam Imag28-s

Circle bordered frame Imag29-s

Snow in square (word) Image29 using WORD feature

Brrr… (word) Imag20-s using WORD feature

Snowflakes Image29 using ICON feature or ICON Blackout feature

Shhh…. (word) Image32 using WORD feature

Rectangle sign shape Imag37-s

Circle with edge dots Imag46-s

Elegant frame Imag49-s

Elegant frame Imag50-s

NOTE: I've made a Word document with this list, if you cannot cut and paste the list from the blog, e-mail me and I'll send it to you.

Sunday, November 16, 2008

Christmas Doings


Goodness! Before we know it the big day will be here. Look below for an entry about how to make Christmas-time serendipity squares. I used Christmas cards (not handmade!) that we received last year for the holidays. Meanwhile, I've been making a few Christmas cards which I will share with you here. One that's been popular on the Cricut Messageboard is a round card, with a patterned paper Teddy Bear on front. I hope you are well on your way to making cards for the holidays, too!

Wednesday, October 29, 2008

In Love with Cricut's Wild Card

I've been studying the Wild Card cartridge, and decided to make a list of all the sayings available on this cart. I'm ecstatic - FINALLY - a cart that has "Happy New Year" on it!!! If you're a card maker, you'll for sure want this cart. Janet and I plan to place an order in the next few weeks, if you want to pre-order and pay up front, we'll sell you the cart for $45.00 plus your shipping (by the way, $45.00 is what WE pay for it!). Call it about $52 with shipping in the US (we do ship internationally, at actual cost).

But - forget about the sale right now - I just want to talk about the expressions ON the cart. Three of the features have sayings. There is the always-present "to" and "from" - (how MANY of these do we need??).....but there are lots of new, cool sayings, too.


I've made an alphabetized list of all the sayings. If you'd like it (in a Word file) e-mail me (sue@scrapbookspirit.com). I like "Cold Hard Cash" and "Snail Mail" and "Miss Talking to You" and "You Make My Heart Sing" (makes me want to do a "Wild Thing" card).

Besides the many useful sayings, the cards and matching envelopes are totally darling! Wild Card - a truly COOL cart!

Here's the LIST of Wild Card Sayings:

#1 Teacher

A Change of Address

A Lovely Easter to You

Be My Valentine

Bloom Where You’re Planted

Bon Appétit

Cold Hard Cash

Congratulations

Enjoy

For the Graduate

For You

From

From Our House to Yours

From the Heart

Get Better

Hand Made With Love

Happy Birthday

Happy Father’s Day

Happy Halloween

Happy New Year

Happy $hopping

Happy Thanksgiving

Hello

Hi

How Thoughtful

I Like You

I Love You

I Missed Your Birthday

It’s a Bridal Shower Baby

It’s a Girl

It’s Your Day

I’ve Been Missing You

Joy

Just Because

Memo

Merry Christmas

Miss Talking to You

New Arrival

Oh Happy Day (in a circle)

Our Wedding

Par Avion

Season’s Greetings

Smile

Snail Mail

Special Delivery

Stamped with Love

Thank You

Thanks

Thanks (a second style)

The

Thinking of You

WOW

With Sympathy

XOXO

You Did It

You Made My Day

You Make My Heart Sing

You’re Invited

You’re Simply the Best


Have fun with Wild Card - great for cards, useful for LO's too!

Thursday, August 21, 2008


This is an invitation that I made for a shower that I am giving. I used the Cricut and my Design Studio Software to create it. The tag and the bells are from the Wedding Solutions Cartridge.

The envelope is a combination of the same tag and a scalloped edge card from the New Arrival Cartridge welded together. The edge around the tag is cut out of the Rose Red and attached on the top of the white tag. The envelope is Stampin' Up double sided Designer Series Paper.

Monday, July 28, 2008

Altered Art from the Medicine Cabinet

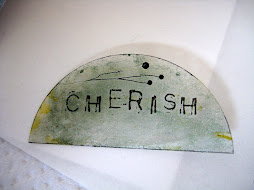
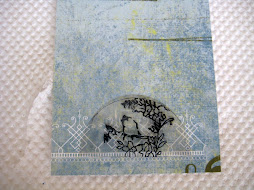
You know you are a true scrapper when everything you touch is looked at with wondering eyes - what could you make with that thing you are just about to throw away? For months now, I've been sticking an estrogen patch on myself twice a week, and noticing the little semi-circular clear transparent backing tabs. Perfect shape, perfect material for LO's and cards. So, I started saving the clear backing and thinking about what I could do with them.

Believe it or not, I dragged a handful of them all the way to Mexico for a week of scrapping with Janet. She laughed pretty hard at my idea to alter the perfect little semi-circles....but I thought they would make perfect little tabs. So I sat around and played - and came up with quite a list of things to do with these remains from estrogen patches.
  • Ink the edges and write words inside with a Sharpie pen
  • Use alcohol ink on one side, flip it over and add a rub-on or a stamp
  • Put perfect pearls on the back
  • Back the tab with patterned paper
  • Stamp on it using Staz-On ink and tiny patterns or designs
I'm betting YOU could come up with even more ideas for how to alter the pull-tabs from the back of estrogen patches. The question is, have you ever altered anything weirder? If so, leave a comment and let me know - we'd LOVE to see a picture! Look to the right for a slide show of my altered patch backings.

Sunday, June 1, 2008

Making Serendipity Square Paper with Recycled Christmas Card Fronts

Our June 2nd edition of The Scrapbook Spirit's e-zine (click here to be added to our e-zine list) will feature an article about making Cricut cuts on serendipity paper. Here's a tutorial on how the paper was made:
Step One: Gather up left over or about-to-be-tossed store-bought Christmas cards and tear off the fronts. (Top right picture.)
Step Two: Tear the card fro
nts up into various sized pieces and shapes. (Second picture, right.)
Step Three: Run the torn pieces through a Xyron, or use another method to put adhesive on the back side of your torn pieces. In the picture at left, you can see my torn card pieces after I have put them through my Xyron 510.
Step Four: Pick a pick of 12 by 12 scrapbook paper in a solid color that will coordinate with the
torn pieces. For Christmas, it's easy to use a green, red, or white paper. Do not use cardstock as it makes the resulting Serendipity Paper too thick to be cut easily by your Cricut.
Step Five: Begin to adher
e your torn card pieces to the 12 by 12 piece of scrapbook paper, in any random fashion. You can leave small areas of the background scrapbook paper showing through, you do not have to completely cover the background paper. (Picture at left shows my paper almost covered by the torn card fronts.)
Step Six: Once you have covered your background paper with the torn strips, you can also randomly stamp designs on top of the torn card pieces (in this case, I used two or three Christmas themed stamps and red ink.) This step is optional. The end result is to give the Serendipity Paper a more distressed, antique, or collaged look. The picture at right shows the ink pad and one of the Christmas stamps I used to randomly stamp over the torn card fronts.
Step Seven: To further give your paper a collaged, artsy look you can also randomly place letter stickers in a coordinating or contrasting color on top of the torn squares. This is a great
way to use up letter stickers you no longer want or use. Again, this is an optional step. The second picture at right shows the letter stickers I used on this Serendipity Paper. They were left over from another project and it was great to put them to good use!
Step Eight: Your Serendipity Paper is complete and is ready to trim and cut. From the back side, you'll see that your card pieces hang over the edge of the 12 by 12 scrapbook paper, but no worries, you will just trim these edges off using a paper cutter or paper trimmer.
Step Nine: Create! You can trim your paper into the tradition two inch by two inch Serendipity Squ
ares and use these on cards, tags, scrapbook pages, and altered art. You can put the 12 by 12 sheet of your paper into your Cricut (E-bug) or cut a 6 by 12 piece and use your smaller Cricut. Cut shapes out to use on cards, scrapbook pages or tags. The picture shows a snowman I cut from the Christmas Cheer cartridge with my Cricut. See our June 3rd issue of The Scrapbook Spirit e-zine for pictures and how to work with your Circut and your Serendipity Paper.

Making Serendipity Paper is like making a crazy quilt. You can use up all sorts of paper scraps and end up with interesting pattern, texture, and design. Have fun playing with your paper scraps, and be sure to send us a few picutres, we'd love to see!


Friday, May 16, 2008

Embellishing the Stitched Spine Tabbed Album

I had such fun deciding how to embellish the front, spine, and inside pages of my stitched spine tabbed album. (See instructions for how to assemble the album in the blog post below.) The idea of putting the album's title on the spine pleased me, so I experimented with letter sizes, ending up with letters cut from Cricut's Zooballoo (ZB) cartridge at 3/4 inch from patterned paper (CTMH's Boom-Di-Ada paper and card stock). The letters are shadowed using hollyhock card stock, which matches some of the inside pages of the album. To help the eye distinguish between the words "On Our Lake" I put a dot of bling between each word. (The bling was from some Heidi Swap bling I had on hand, which matches the hollyhock colored card stock.)

On the album's cover, I cut a one-inch strip of the "rick-rack" patterned paper from the Boom-Di-Ada paper collection and adhered it to the right edge of the album cover. Next, I used coordinating CTMH fiber, wrapping it around the cover twice so that two strands of fiber show on the album front. Inside, the fibers are tied in a bow. This helps make the embellishment for the inside cover page, as well.

Using the Fabulous Finds (FF) cartridge with my Cricut, I cut Tab 4 at 2 1/4 inches Real Dial Size (RDS) to make the tab that goes on top of the tab on the album cover. It is cut from another patterned paper from Boom-Di-Ada, and the center is a solid coordinating card stock. I cut the tab in half so that it did not actually wrap around to the inside of the page. Using coordinating colored small brads, I attached them first before adhering the tab to the cover (I didn't want the brad's legs to show on the inside cover). The words "Good Times" are stamped inside the tab using Sweet Leaf ink from CTMH. The "Good Times" stamp is also from a CTMH stamp set.

The flower on the album front is Accent 46 from the Accent Essentials (AE) cartridge cut at 3 inches Real Di
al Size (RDS), from patterned paper. It is backed with the yellow from the Boom-Di-Ada collection. In the center I used a patterned chipboard flower from Prima with the CTMH fiber tied through the button holes. I used the center part of the Accent 46 cut to make the little flower that is on the "vine" and put a dot of bing in the flower's center. The two "vines" are Accent 20 (using the shift key) cut at 2 inches RDS.

Decorate your tabbed album pages with the remaining patterned paper and card stock to suit your pics and journaling. Here
's a pic of the inside cover and first page of my tabbed album: I used the Spiral from Accent Essentials (cut at two inches RDS) on the corner of the top left picture on the left page. The waves on the bottom of the page are from the Going Places cartridge and are cut at 2 inches RDS.

I'd totally love to see your creations so please share your tabbed album by sending us pics (scrapspirit@hughes.net).