

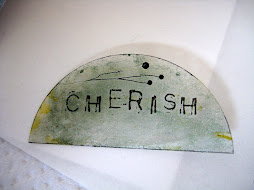
Janet used the Plantin Schoolbook cartridge to make her word book. You will need Design Studio Software to lay out the pages for the book.
Janet says:
With the shift key engaged, I used the rectangle on the bottom row, second key from the right. I sized the first rectangle 11/2" wide by 31/2" tall. Each additional rectangle was sized 1" wider than the one before it by the same 31/2" tall. I sized the letters 2" wide by 3 ½" tall. Be sure to check the weld box for each rectangle and letter. Position the letter half on the rectangle and half off. Cut the pages out of chipboard. Each page will be 1" longer than the one before it.
If you choose to make your book larger than the size I have done, each rectangle will increase in width by half of the width of the letter. Example: if your letters are 3" wide, increase the width of the rectangles by 11/2".
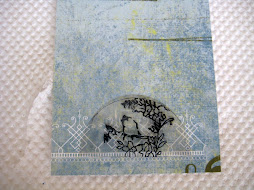
Next you will choose the paper to cover your chipboard book. I cut the rectangles out of patterned paper and the letters out of a solid color.
Next, go into your DSS program and remove the letters from the page. You will cut 2 of each size rectangle, one for the front of the page and one for the back. Next, create a page with the letters on it. Size the letters the same as before, 2" x 31/2". You will need 2 of each letter, checking the flip shape box for one of each. This will give you one letter turned backwards for the back of the page.
After cutting all the rectangles and letters out of paper, you will apply adhesive and attach the rectangle and then the letter to each page. The letter will overlap the rectangle. I used my Zyron 510 to apply the adhesive to the paper. You can also use a solid stick adhesive if you prefer.
You can bind your pages using a Bind-it-all. If you don't have one, you can punch holes with a rectangle punch and lace ribbon through the holes to create a binding.
Janet says:
With the shift key engaged, I used the rectangle on the bottom row, second key from the right. I sized the first rectangle 11/2" wide by 31/2" tall. Each additional rectangle was sized 1" wider than the one before it by the same 31/2" tall. I sized the letters 2" wide by 3 ½" tall. Be sure to check the weld box for each rectangle and letter. Position the letter half on the rectangle and half off. Cut the pages out of chipboard. Each page will be 1" longer than the one before it.
If you choose to make your book larger than the size I have done, each rectangle will increase in width by half of the width of the letter. Example: if your letters are 3" wide, increase the width of the rectangles by 11/2".
Next you will choose the paper to cover your chipboard book. I cut the rectangles out of patterned paper and the letters out of a solid color.
Next, go into your DSS program and remove the letters from the page. You will cut 2 of each size rectangle, one for the front of the page and one for the back. Next, create a page with the letters on it. Size the letters the same as before, 2" x 31/2". You will need 2 of each letter, checking the flip shape box for one of each. This will give you one letter turned backwards for the back of the page.
After cutting all the rectangles and letters out of paper, you will apply adhesive and attach the rectangle and then the letter to each page. The letter will overlap the rectangle. I used my Zyron 510 to apply the adhesive to the paper. You can also use a solid stick adhesive if you prefer.
You can bind your pages using a Bind-it-all. If you don't have one, you can punch holes with a rectangle punch and lace ribbon through the holes to create a binding.
Here's a link to the .cut file used to create this book.


.gif)