
 Our June 2nd edition of The Scrapbook Spirit's e-zine (click here to be added to our e-zine list) will feature an article about making Cricut cuts on serendipity paper. Here's a tutorial on how the paper was made:
Step One: Gather up left over or about-to-be-tossed store-bought Christmas cards and tear off the fronts. (Top right picture.)
Step Two: Tear the card fronts up into various sized pieces and shapes. (Second picture, right.)

Step Three: Run the torn pieces through a Xyron, or use another method to put adhesive on the back side of your torn pieces. In the picture at left, you can see my torn card
 pieces after I have put them through my Xyron 510.
Step Four: Pick a pick of 12 by 12 scrapbook paper in a solid color that will coordinate with the torn pieces. For Christmas, it's easy to use a green, red, or white paper. Do not use cardstock as it makes the resulting Serendipity Paper too thick to be cut easily by your Cricut.
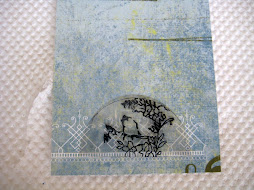
Step Five: Begin to adhere your torn card pieces to the 12 by 12 piece of scrapbook paper, in any random fashion. You can leave small areas of the background scrapb
 ook paper showing through, you do not have to completely cover the background paper. (Picture at left shows my paper almost covered by the torn card fronts.)
Step Six: Once you have covered your background paper with the torn strips, you can also randomly stamp designs on top of the torn card pieces (in this case, I used two or three Christmas themed stamps and red ink.) This step is optional. The end result is to give the Serendipity Paper a more distressed, antique, or collag
 ed look. The picture at right shows the ink pad and one of the Christmas stamps I used to randomly stamp over the torn card fronts.
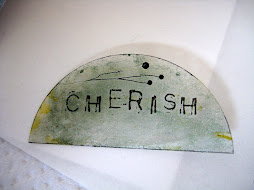
Step Seven: To further give your paper a collaged, artsy look you can also randomly place letter stickers in a coordinating or contrasting color on top of the torn squares. This is a great way to use up letter stickers you no longer want or use. Again, this is an optional step. The second picture at right shows the letter
 stickers I used on this Serendipity Paper. They were left over from another project and it was great to put them to good use!
Step Eight: Your Serendipity Paper is complete and is ready to trim and cut. From the back side, you'll see that your card pieces hang over the edge of the 12 by 12 scrapbook paper, but no worries, you will just trim these edges off using a paper cutter or paper trimmer.
Step Nine: Create! You can trim your paper into the tradition two inch by two inch Serendipity Squ
 ares and use these on cards, tags, scrapbook pages, and altered art. You can put the 12 by 12 sheet of your paper into your Cricut (E-bug) or cut a 6 by 12 piece and use your smaller Cricut. Cut shapes out to use on cards, scrapbook pages or tags. The picture shows a snowman I cut from the Christmas Cheer cartridge with my Cricut. See our June 3rd issue of The Scrapbook Spirit e-zine for pictures and how to work with your Circut and your Serendipity Paper.
Making Serendipity Paper is like making a crazy quilt. You can use up all sorts of paper scraps and end up with interesting pattern, texture, and design. Have fun playing with your paper scraps, and be sure to send us a few picutres, we'd love to see!

.gif)
No comments:
Post a Comment